|
[setup of PDA]
|
< install >
[notice] Pplease remove the previous version of CSp-CE before installing the up to date version of it. |
(1)How to install via PC(ZIP version)
1. Download CSp-CE(ZIP version) to PC from CSp-CE homepage.
2. Extract downloaded ZIP file to a folder in PC.
3. Connect PC and PDA via ActiveSync.
4. Run Setup.exe in extracted folder in step 2.

5. Select [yes] and installation CSp-CE will started.

6.
If installation is completed CSp-CE will be added to start menu or program folder.

(2)How to install it on PDA directly(CAB version)
1. Download CSp-CE(CAB version) to PDA from CSp-CE homepage.
2. The following dialog will be displayed when download to PDA is started.

"Please check [open file after download].
Installation runs automatically after download completed.
(downloaded cab file will be removed after installation).
3.
If installation is completed CSp-CE will be added to start menu or program folder.

|
|
|
|
[operation]
|
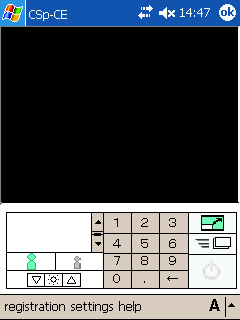
1.Tap the shortcut icon of CSp-CE of the menu.

2.The dialogue of CSp-CE will be displayed.

|
|
click the [OK] button upper-right corner of the dialogue.
the CSp-CE will end when the dialogue disappears.

|
|
| <
register the destination PC(connecting number) > |
1.Select the [destination registration] ->[destination registration] of tool bar.

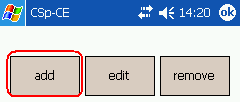
2.Tap [new] button.

3.input [name],[connecting number],[extension number],[password] and [security code]
(refer to :[4-2 register/edit dialogue of destination])
| name |
set the name in connection partner list. |
| connecting number |
set the connecting number of the destination. |
| extension number |
set the extension number of the destination. |
password
(any one) |
if the password of the destination is set. set the connecting password of the destination . |
| Security code (any one) |
if the Security code of the destination is set. set the Security code of the destination . |
4. Tap the [OK] button.
* if you do not use the list of destination
1.Input the destination PC (connecting number) by ten-key.
if he has a extension number, please input in after the connecting number .
* if you input a number which is not registered in the [list of destination] ,
the setting of the registering number will be reflected.

2.Tap the [connect] button.

* If the destination PC (connecting number) has been registered in the list of destination
1. Select the destination PC (connecting number) registered in the [address bar].
2. Tap the [connect] button.

|
|
connecting number for CS connecting test
(destination Japan) connecting number [999139.228](Fixed camera)
(destination Japan) connecting number [999172.10](Unfixed camera)
|
|
|
| < Remote control of a camera > |
the remote control of camera from CSp-CE can be achievable if you connect the controlling camera to image transmitting PC(CSs).
1. if it is connected with the image transmitting PC(CSs) which has been connected with the controlling camera ,
the part of numerical keypad will change to control remote-control gadget.

it will zoom in if you press the [+] button.
it will zoom out if you press the [-] button.
it will reset it if you press the [hand glass] button.

move up and down or left and right by arrow key.
move to the center if you press the [home] button.
|
|
1. Tap the [cut off] button.

|
|
| < operation during a call > |
| setting of transmission rate |


*if you select [auto],the displaying rate will change according to the movement of the image and the condition of the circuit and the influence of the PC server load.
*if you select [1frame/second] ,the reception image will be displayed 1 frame a second.
*if you select [5frame/second] ,the reception image will be displayed 5 frame a second.
*if you select [10frame/second] ,the reception image will be displayed 10 frame a second.
*the displaying rate you set may be unsustainable because it is affected by the movement of the image , the condition of the circuit ,the CPU of PDA and the influence of the PC server load. |
|


* press the standard button /small size button, and select 3 levels of the high/middle/low image quality.
*
If you select the high image quality, the number of images will drop off but the image quality will be better.
*
If you select the low image quality, the number of images will increase but the image quality will be worse.
|
|
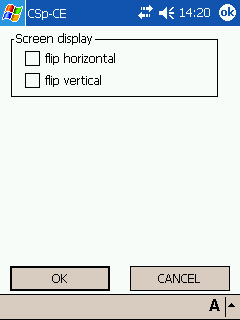
| flip the image displayed vertical/horizontal |
flip the image displayed vertical or horizontal.
1.Select the [setting] ->[displaying setting] from the tool bar.

2.Check [flip vertical],[ flip horizontal] from the item of [flipping image].

|
|
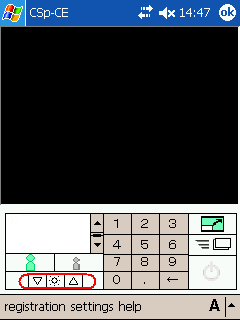
| Set the brightness of image receiving |
Adjust the brightness of image receiving.
it will become brighter if you press + button
it will become blacker if you press - button.
it will return to the standard one if you press the middle button.

|
|
 |
|